This is a small pictoral of how I turn a pot from start to finish. Well, the pot will be ready to put finish on when we are through with these steps.
Step One: I first use a compass to mark all of my blanks on the board that I am going to use. I then use a bandsaw, although a jig saw also works, to cut the blanks out....
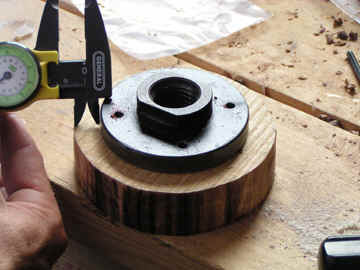
Step Two: After cutting the blanks out, I then take my face plate and center it on the blank. I use a caliper to check all the sides and make sure that it is the same distance to the edge of the pot. This will get you pretty centered on the blank and cause you to have less waste when you start turning....
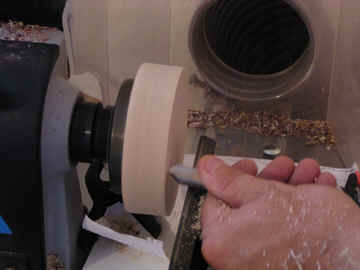
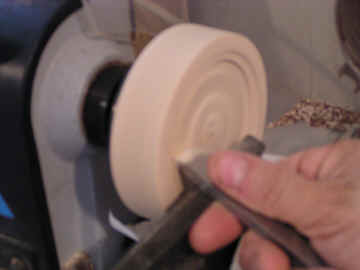
Step Three: After the pot is screwed to the face plate, I will put it on the lathe and use a 1/2" gouge to take any extra wood off of the blank. This also will center the piece up on your lathe....

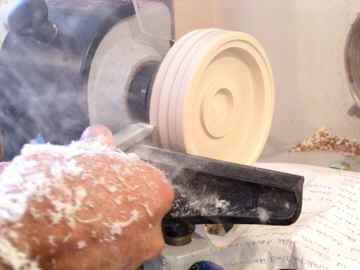
Step Four: I then turn my tool rest to the front of the pot and using the gouge, square the pot up on the lathe. Be careful with the gouge at this step. You will have to work your way away from the center of the pot and leave a "high" spot there. That can be taken off with a skew. The gouge can dig into the pot and take off a lot more than you want to....
Step Five: This picture came out a little blurry, but you can still get the idea. I center the glass up on the blank and trace around about 1/4 of the piece. This is what I will go by when cutting the ledge for the glass to site on. I like to cut about 1 /16" inside the mark and stop the lathe to fit check the glass. If your glass is not centered perfectly when you mark it with the pencil then you will cut too wide of a ledge for your glass to sit on. Sometimes I turn the lathe off 10+ times and check the glass and see if it will fit. This is when you will want to check the depth of the ledge also. Remember that sanding will remove some of the excess wood from the lip of the pot, so don't make it perfectly even. If you do, your glass will sit higher than the pot when you glue it in...
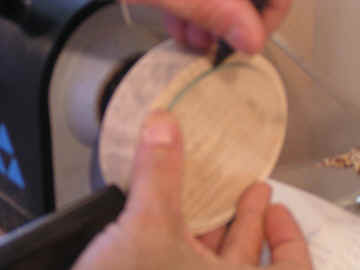
Step Six: Another blurry pic. It is hard to get a good one when the lathe is turning 3500 rpm's. I use the skew to cut the lip for the glass to sit on. On the opposite side of the camera here, you can see the lip forming.
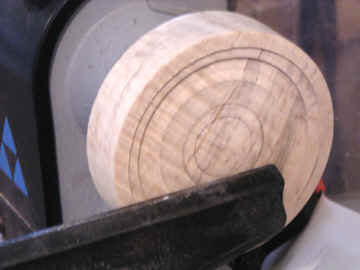
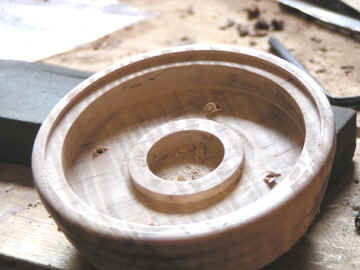
Step Seven: Here you can see the pencil marks in the center of the blank. That is going to be my pedestal for the soundboard to sit on. Everybody uses a different height, thickness and width of pedestal. There is no right or wrong size for this, but trial and error will tell you what you need. This is very important for the sound of the call....
Step Eight: Here the inside of the pot is almost finished. All I have left to do is take some more off the bottom of the pot so that the soundboard sits higher in the pot. This is done with the skew....
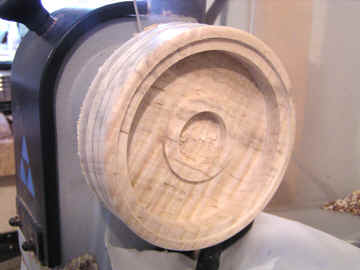
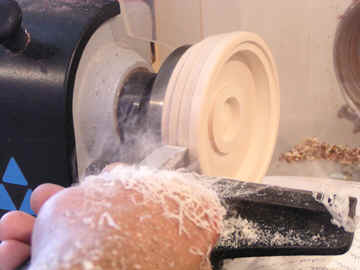
Step Nine: After getting the inside of the pot finished, I then move to the outside with the piece still on the face plate. Some style of pots I remove here and use the chuck. If you look fromt he right side of the pot you can see two pencil lines and then a grey area. This is going to be my guide for turning the pot. The grey area will be removed before I am done...
Step 10: Here I am using the skew to remove the bottom of the pot. This will make the call the desired thickness and the bottom of the pot the desired thickness...
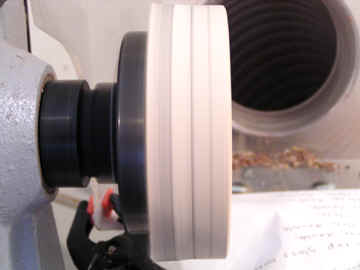
Step Eleven: I have removed the excess off the bottom of the pot as much as I can when using the face plate. I am not shaping the outside of the pot using the skey. Here you can see the pedestal on the inside....
Step Twelve: Here you can see the design of this particular pot. The 1/8" closest to the face plate will be removed after I put the call on the chuck....
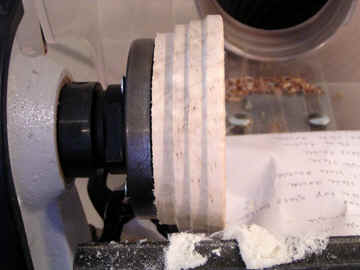
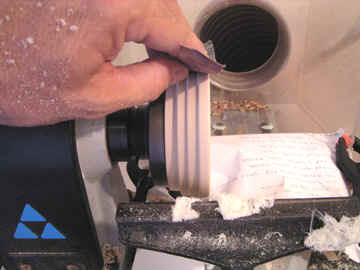
Step Thirteen: Before taking the pot off of the face plate, I do all of my sanding to the sides and inside. I like to do it now because the piece is centered on the lathe still and you do a better job. I do this while the lathe is on high. Be careful not to get the pot too hot or your fingers too hot. I start with 150 grit and work my way through what I have here....150, 220, 320 and then 400 grit.....
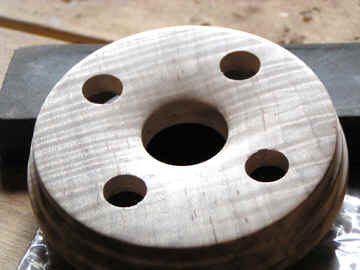
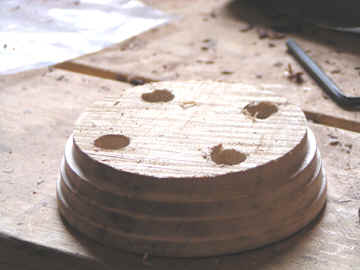
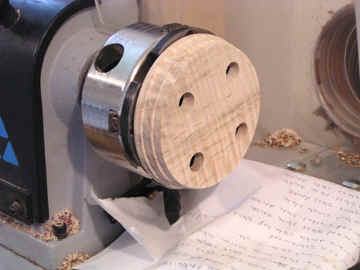
Step Fourteen: After taking the pot off of the faceplate, you will see four holes in the back. I use a small drill bit to drill from the outside to the inside. I then take a larger bit and while holding the pot firmly on a solid peice of scrap wood, cut from the inside of the pot out. If the back of your pot is square and you drill somewhat slow, you will not tear the back of the pot out. I have used a C-clamp before and placed it in the center of the pot to hold it down while drilling. On this style pot it doesn't matter if it tears, because I still have 1/8" to remove....
Step Fifthteen: This is the pot after it has been drilled out. Different size and number of holes will also make a difference in the sound of the pot. There is not magic combination, just what you come up with that gives a sound that you like....
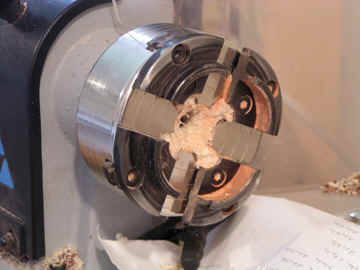
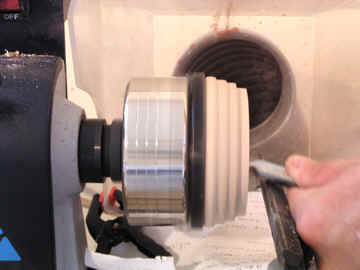
Step Sixteen: This is the chuck that I will use to finish the rest of the call. It is a Super Nove chuck. I wasn't sure that I would use one enough if I bought one to make it worth it. I now use it on every call that I turn. It is a self centering chuck also...
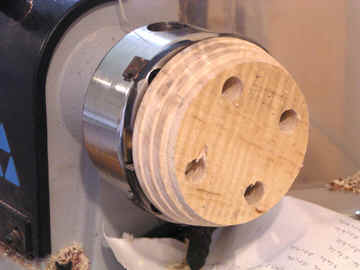
Step Seventeen: This is the pot on the chuck. Don't over tighten it or it will crack while you are turning. A flying pot is impossible to get out of the way of. You can see how the back of the pot split out while I was drilling. Some call makers use a countersink bit and drop it down into the back to take these spots out....
Step Eighteen: I use the gouge to take the excess wood off the back of the pot. This will get the majority off for me and maybe all of it if I was better with the tool. I use the skew once I get close to clean up the back of the pot....
Step Nineteen: Here is the pot almost finished. On this particular design, I am doing a little extra to the bottom of the pot. I am cutting a hole in the center that is done with the skew and concaving the bottom of the pot slightly...
Step Twenty: Here the pot is ready to have turkey tracks put in, signed and dated and finish applied. There is still a couple of hours left at this point, but the rest is pretty simple....